
Everything You Need to Know When Taking the Perfect Infrared Image
Thermal cameras are becoming increasingly popular within a wide range of applications.
As the popularity of infrared cameras increases, the technology also improves, making the process of taking a thermal image faster; but what do you need to do to take the perfect picture?
The Basics for taking the perfect Image
Focus –
This is probably the most important part of taking a picture. The focus of an image can affect the overall quality, accuracy and sharpness of your photo.
If the image taken is blurry, it can cause you to come across as unprofessional and can in turn make it harder to identify the object and any faults that may be present. When taking a picture that’s out of focus, your measurements could be off by as much as 20°c, so your photo must always be focused and sharp.
Resolution –
The resolution of your thermal camera can play a big part when it comes to producing high-quality images. If you’re looking to take well-focused and clear images, it can be beneficial to use an infrared camera with a high infrared resolution as the more pixels the detector has, the more detail your image will have.
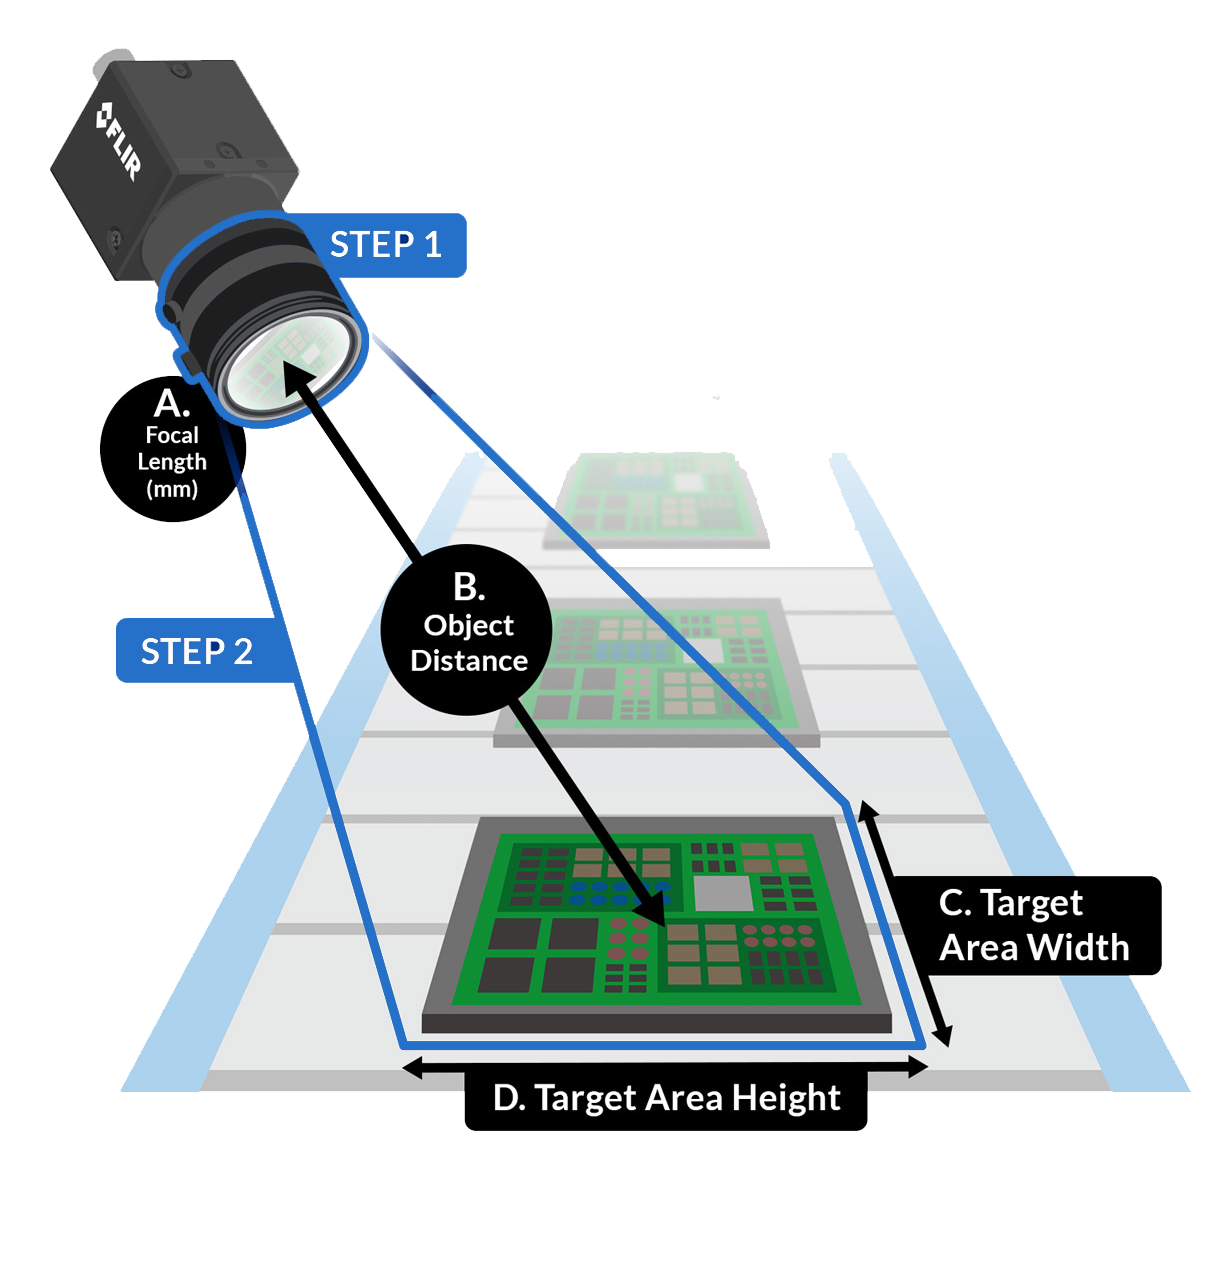
Field of View –
Field of View (FOV) is what your thermal camera can see during use. Depending on the application you’re looking to inspect, such as a building survey that would benefit from a camera with a wider FOV to fit everything you’re inspecting in a particular area into one image. When analysing smaller objects, but from a greater distance you may find it more advantageous to use a camera with a narrow FOV.
How important is Temperature Range?
The majority of infrared cameras have a choice of multiple temperature ranges so you can measure a wider range of temperatures accurately.
If you select a temperature range that’s too low, the image can become oversaturated due to higher temperature objects emitting more infrared radiation compared to colder objects. This scenario is similar when you select a temperature range that’s too high, the image will appear underexposed.
For the temperature measurement to be as accurate as possible, it’s recommended that the lowest temperature range available on your thermal camera is selected in the camera's settings, you also need to ensure the temperature range selected includes the highest temperature present in the image/ object you are inspecting.
How do you know if you’ve chosen the correct colour palette?
Each infrared camera comes with a range of colour palettes available as standard. Each colour palette available helps distinguish the thermal variations and patterns present in the image; in simpler terms, they translate the radiation strengths into colours for us to see visually.
The most commonly used colour palettes and their uses are:
Iron Palette –

Presenting hot objects in warmer tones (yellows and whites) and colder objects in cooler tones (blues and blacks) this variation in tones makes it easy for individuals to understand without much experience of thermal imaging.
The general purpose of the iron palette is to quickly identify anomalies in temperature and demonstrate the heat distribution and details of the image in different colours/ tones. Making it the perfect palette for mechanical and electrical applications.
Rainbow Palette –
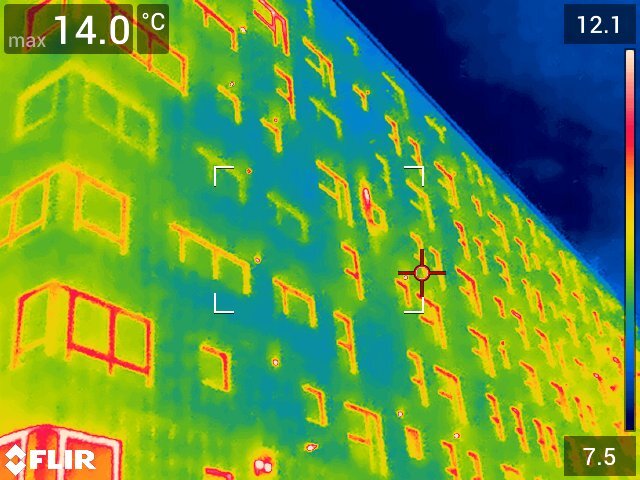
Due to the variety of colours present in the rainbow palette you can detect objects with small temperature changes, making it the perfect palette for a building survey. Due to the complex colours in the rainbow palette, you can see a greater contrast between temperatures however, this can also lead to an image appearing as noisy if there is a lot of temperature differences.
White Hot -

This is the most used colour palette, displaying warmer objects in white and colder ones in black. This palette is appealing for those using it for law enforcement or security monitoring due to its ability to keep a scene simple for conditions that can present a wide variety of temperatures.
Black Hot –

Running on a similar principle to the white-hot palette, this palette displays warmer objects in black and cooler ones in white. This can be particularly helpful for wildlife professionals as it displays people and animals in a clear and life-like image.
Do you need thermography training?
Most infrared cameras operate similarly to a digital camera with the concept of focusing and capturing the image.
You must ensure that the object parameters are correct before taking any images as this will give you incorrect temperature readings:
Emissivity
Atmospheric
Reflective Temperature
Ambient
Distance to object
Humidity
For best results, a thermal imaging course is essential as you will gain a greater understanding of what you’re measuring and what to consider when taking that picture but it’s not the end of the world if you don’t.
Equipment can play a big role when it comes to taking the perfect image but having the best thermal camera around doesn’t mean your infrared photo will be perfect.
Take time to get to know your equipment before jumping straight into the world of infrared photography and of course, if you get stuck at all just give us a call and we will be more than happy to help you take the perfect infrared photo.
